Code Your Own Website
Intro to HTML + CSS
Class 4
Normal Flow vs. Out of Flow
Normal Flow
The typical way a browser positions an element in respect to elements around it
» An element without any CSS positioning applied is considered in normal flow
Out of Flow
When an element's default position is overridden, the element is considered out of flow
Normal Flow
Property: position
The Default static Position
selector {
   position: static;
}
The default position property's value for all HTML elements (block-level, inline, etc.) is static
Static elements are in normal flow
Usually you wouldn't specify position: static; since it is the default position of every element
Property: position
The Default static Position
So far, every element we've worked with has been static
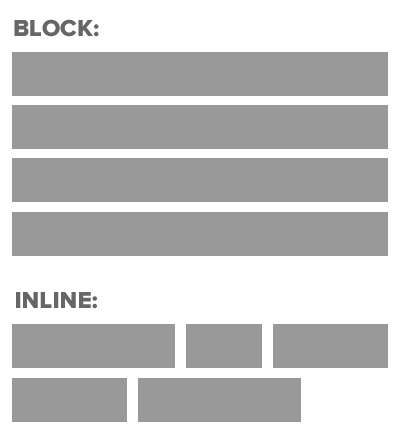
Block-Level Elements:
<p>
<div>
<section>
<main>
<aside>
<h1>
Inline Elements:
<span>
<em>
<strong>
<a>
<img>
Out of Flow
Relative Positioning
To move an element relative to where it ordinarily would rest in normal flow, use relative positioning
selector {
   position: relative;
}
Relative Positioning
Use the top, bottom, right, and left properties to set the location
These values position the element relative to where it would be normally
An empty area shows where the element once was, when the element was in normal flow
Unlike static elements, a relative element can overlap other elements
See the Pen Relative Positioning by Liz Shaw (@anythingcodes) on CodePen.
Absolute Positioning
selector {
   position: absolute;
}
When you specify position: absolute; the element is removed from the document and placed exactly where you tell it to go
Nothing shows where the element once was, when the element was in normal flow
Unlike static elements, an absolute element can overlap other elements
Absolute Positioning
Setting the Location
Use the top, bottom, right, and left properties to set the location
By default, an absolute element's location is relative to the window (the <html> element)
If the absolute element is within a non-static element, its location will be relative to the closest non-static element
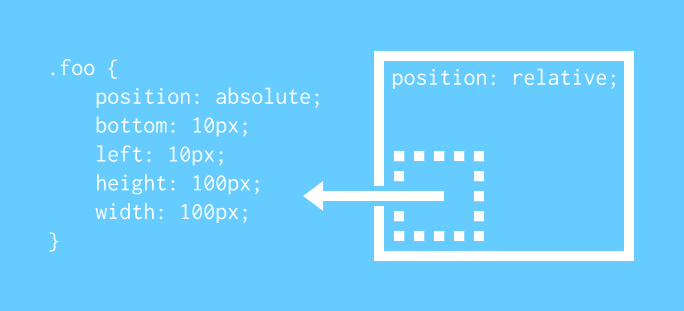
Absolute Positioning
See the Pen Absolute Positioning by Liz Shaw (@anythingcodes) on CodePen.
Absolute Positioning
How to limit an absolute element's scope
We can corral an absolute element inside any non-static (e.g. relative) element
Absolute Positioning
How to limit an absolute element's scope
See the Pen Limiting an Absolute Element's Scope by Liz Shaw (@anythingcodes) on CodePen.
Z-Index
Non-static elements can overlap
You can change the order of overlapping with z-index
The element with the highest z-index goes on top
z-index only works on non-static elements (such as relative or absolute)
.bottom {
   position: absolute; /* absolute is a non-static position */
   bottom: 10px;
   left: 60px;
   background-color: lightcoral;
}

.top {
   position: absolute; /* absolute is a non-static position */
   bottom: 15px;
   left: 60px;
   background-color: lightseagreen;
   z-index: 2;
}
Z-Index
An Example
See the Pen Z-Index - Before by Liz Shaw (@anythingcodes) on CodePen.
Let's Develop It!
Let's use relative and absolute positioning to style our site's banner section

Property: float
selector {
   float: left;
   float: right;
}
The float property shifts an element to the left or right on the current line, taking it out of normal flow
When an element is floated, subsequent elements wrap around it
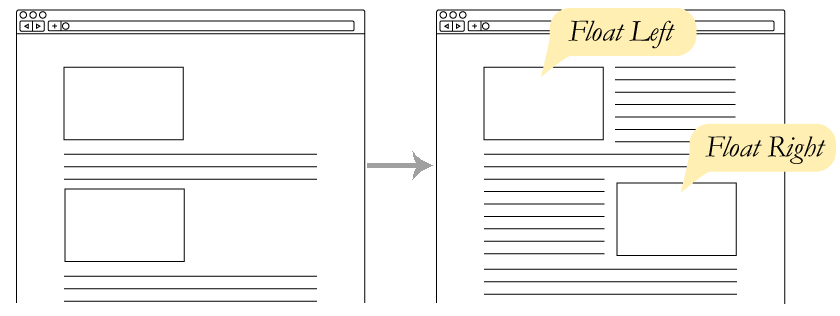
Property: float
An Example
See the Pen Float - Before by Liz Shaw (@anythingcodes) on CodePen.
Property: float
Using float in Layouts
Use float on block-level elements (<aside>, <main>, <div>, etc.) to make page layouts
Always set a width on floated block-level elements used in layouts
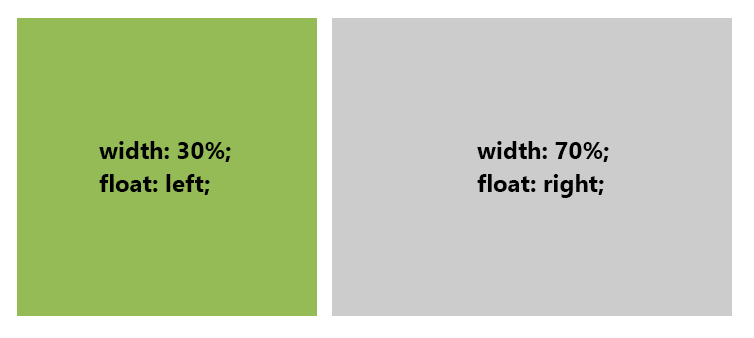
Property: float
Example: Using float in Layouts
See the Pen Float in Layouts - Before by Liz Shaw (@anythingcodes) on CodePen.
Property: clear
selector {
   clear: left;
   clear: right;
   clear: both;
}
The clear property is used exclusively on elements surrounding floated elements
It tells the element on which side (left, right, or both) floated elements cannot appear
See the Pen Float with Text - Before by Liz Shaw (@anythingcodes) on CodePen.
Let's Develop It!
Let's use floating to style our site's portfolio section

Questions
Bonus Material:
Getting Your Site Online
Press the down arrow or spacebar to view
Method 1: GitHub
GitHub is free and a great intro to version control
A version control system records changes to a file or set of files over time so that you can keep track of changes and roll back to previous revisions
Almost every web agency uses a version control system
http://anything.codes is hosted for free on GitHub! See?
Method 1: GitHub
- Create an account on GitHub.com
- Download GitHub Desktop, then open it and login
 Click the plus sign and, under the Add tab, browse to the project folder you used for this class
- An error message will display; click create a repository
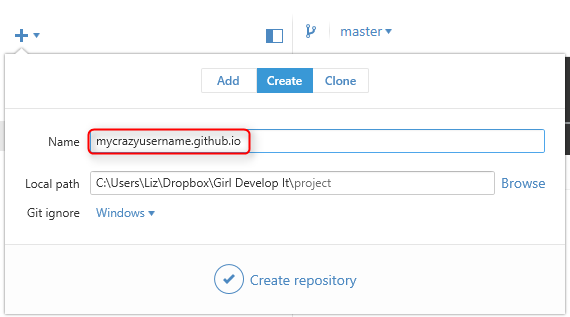 Change the Name to yourusername.github.io (substitute yourusername with your GitHub username)
- Click Create repository (Don't worry about changing Local path or Git ignore)
Method 1: GitHub
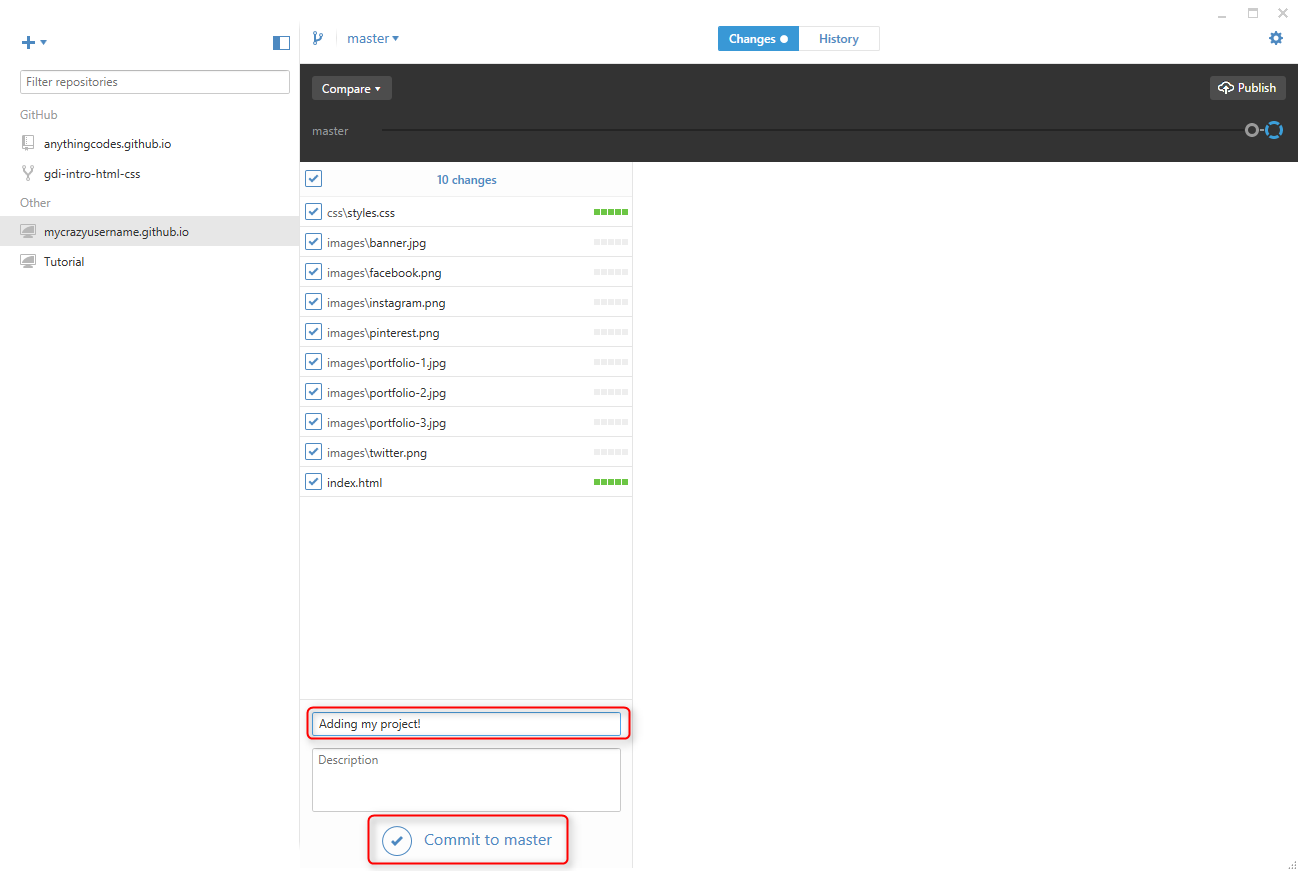
- Click Changes, where you should see a list of project files.
- Enter a Summary and click Commit to master
Method 1: GitHub
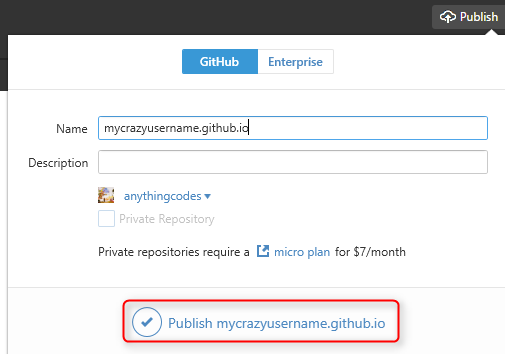 Click Publish at the top, making sure Name is in the correct format (yourusername.github.io, except with your username)
- Within a few minutes, your site will be live at http://yourusername.github.io (substituting your GitHub username for yourusername). Check it out!
- Any time you make changes to your project files, open GitHub Desktop, Commit (step 8) and then click the
 button to publish your changes.
Method 2: Hosting + Domain
There are two paid services involved:
- Web Hosting: A computer (a.k.a. server) where your site's files are located, which is visible to the outside world using a browser
- To publish changes to your site, you upload individual files from your computer to the server using a File Transfer Protocol (FTP) program such as Filezilla
- The web hosting company will give you FTP info
- Domain Name: The name you type in to the browser (e.g. anything.codes or girldevelopit.com)
- Buying a domain is often called registering, so companies that sell domain names are often called Domain Name Registrars
Method 2: Hosting + Domain
You can buy hosting from one company and a domain name from another, but it's usually less of a hassle to buy both from the same company
I use 1&1's Starter package, since it includes hosting and one domain name
When it comes to hosting, don't be fooled by the extra bells and whistles — if you aren't sure what something is, you probably don't need it
Method 2: Hosting + Domains
Why are there two separate services?
First, your files need to be stored on a web host, which is a computer (a.k.a. server)
When you register a domain, it doesn't 'point' to the server where your files are located
This is why your web host may give you a Domain Name System (or DNS) address, which is the IP address of the computer (a.k.a. server) where your files are located
The Domain Name System (DNS) is a huge list that links your domain name (e.g. anything.codes) to where your files are located (using the IP address of the server where your files are located)
Thank you all!
For those taking the intermediate course, there is no course next week; it begins the week after, on Tuesday, November 10th